如何在 Outlook 2019 中設立電郵戶口
以下,我們將展示如何於 Outlook 2019 內設立電郵帳戶。
1. 打開 Outlook 2019 應用程式 並點選左上角的 “檔案” / “FILE”

在點選左上角的 “檔案” / “FILE” 後,會出現以下頁面,請點選 “新增帳戶” / “Add Account”

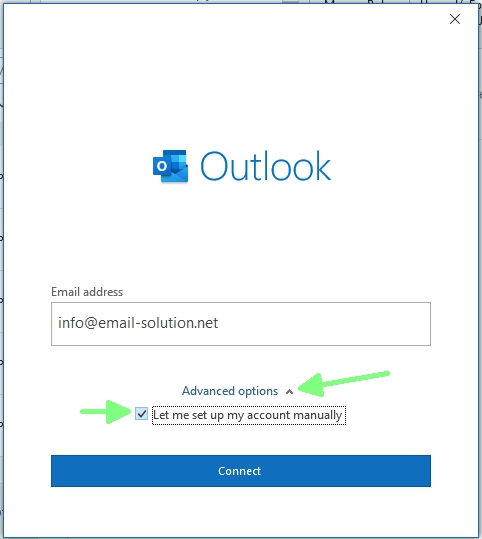
輸入您的電郵
打開 ” Advanced options ” 並點選 ” Let me set up my account manually ”
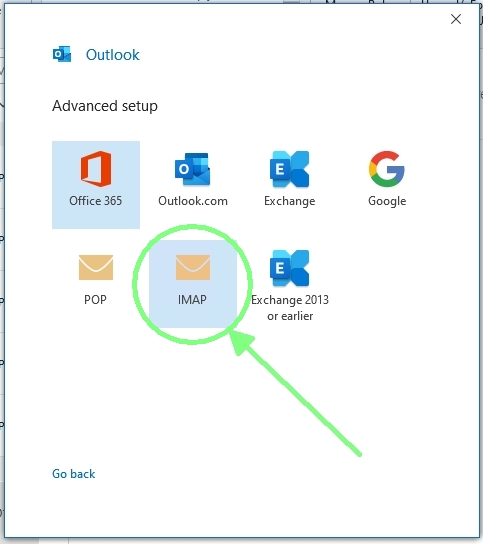
選擇 POP 或 IMAP
POP (電郵下載至你的電腦裡,適合固定地方用戶,e.g. office user)
IMAP (電郵儲存在伺服器上,適合多裝置用戶,e.g. mobile user)
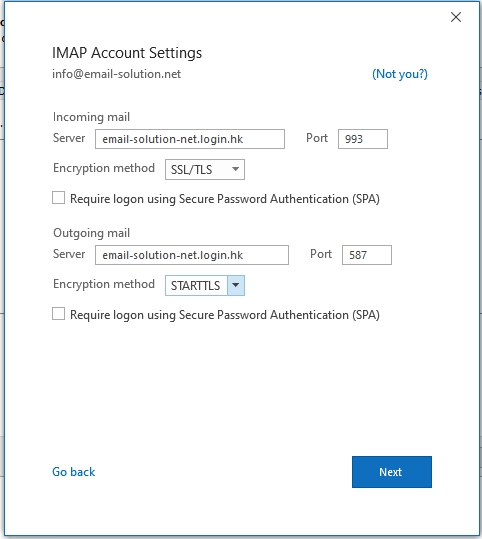
出現如下圖的預設資料,並按下 ” Next”
(電郵伺服器名稱請參閱帳戶資訊電郵)
Incoming Mail via IMAP (電郵儲存在伺服器上,適合多裝置用戶,e.g. mobile user)
IMAP Server : yourdomain-com.login.hk
IMAP Port: 993
Encryption method : SSL/TLS
or
Incoming Mail via POP3 (電郵下載至你的電腦裡,適合固定地方用戶,e.g. office user)
POP3 Server : yourdomain-com.login.hk
POP3 Port: 995
Encryption method : SSL/TLS
——
Outgoing Mail SMTP
SMTP Server : yourdomain-com.login.hk
SMTP Port: 587
Encryption method : STARTTLS
——
SSL、TLS 是加密連線
STARTTLS 是機會性加密連線 (若支援 TLS 加密,則使用 TLS 加密連線;否則使用普通連線)
Plain-text 是普通 (非加密) 連線
輸入您的電郵密碼,並按下 ” Connect ”

完成

現在,閣下的電郵帳戶,已成功設置於 Outlook 2019 中並可以開始使用。
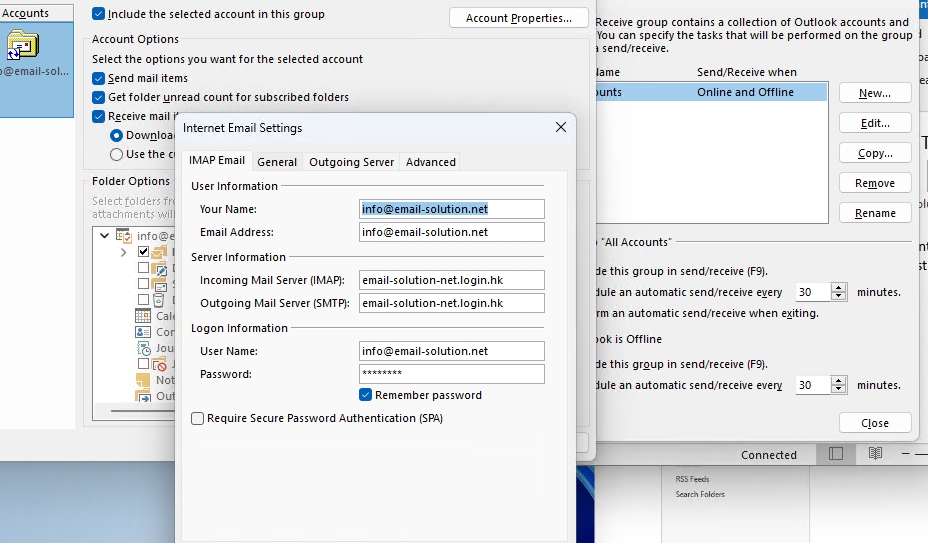
若日後需要修改設定,
在 Outlook 內 Send/Receive > Send/Receive Groups > 選取您的電郵地址 > Define Send/Receipe Group
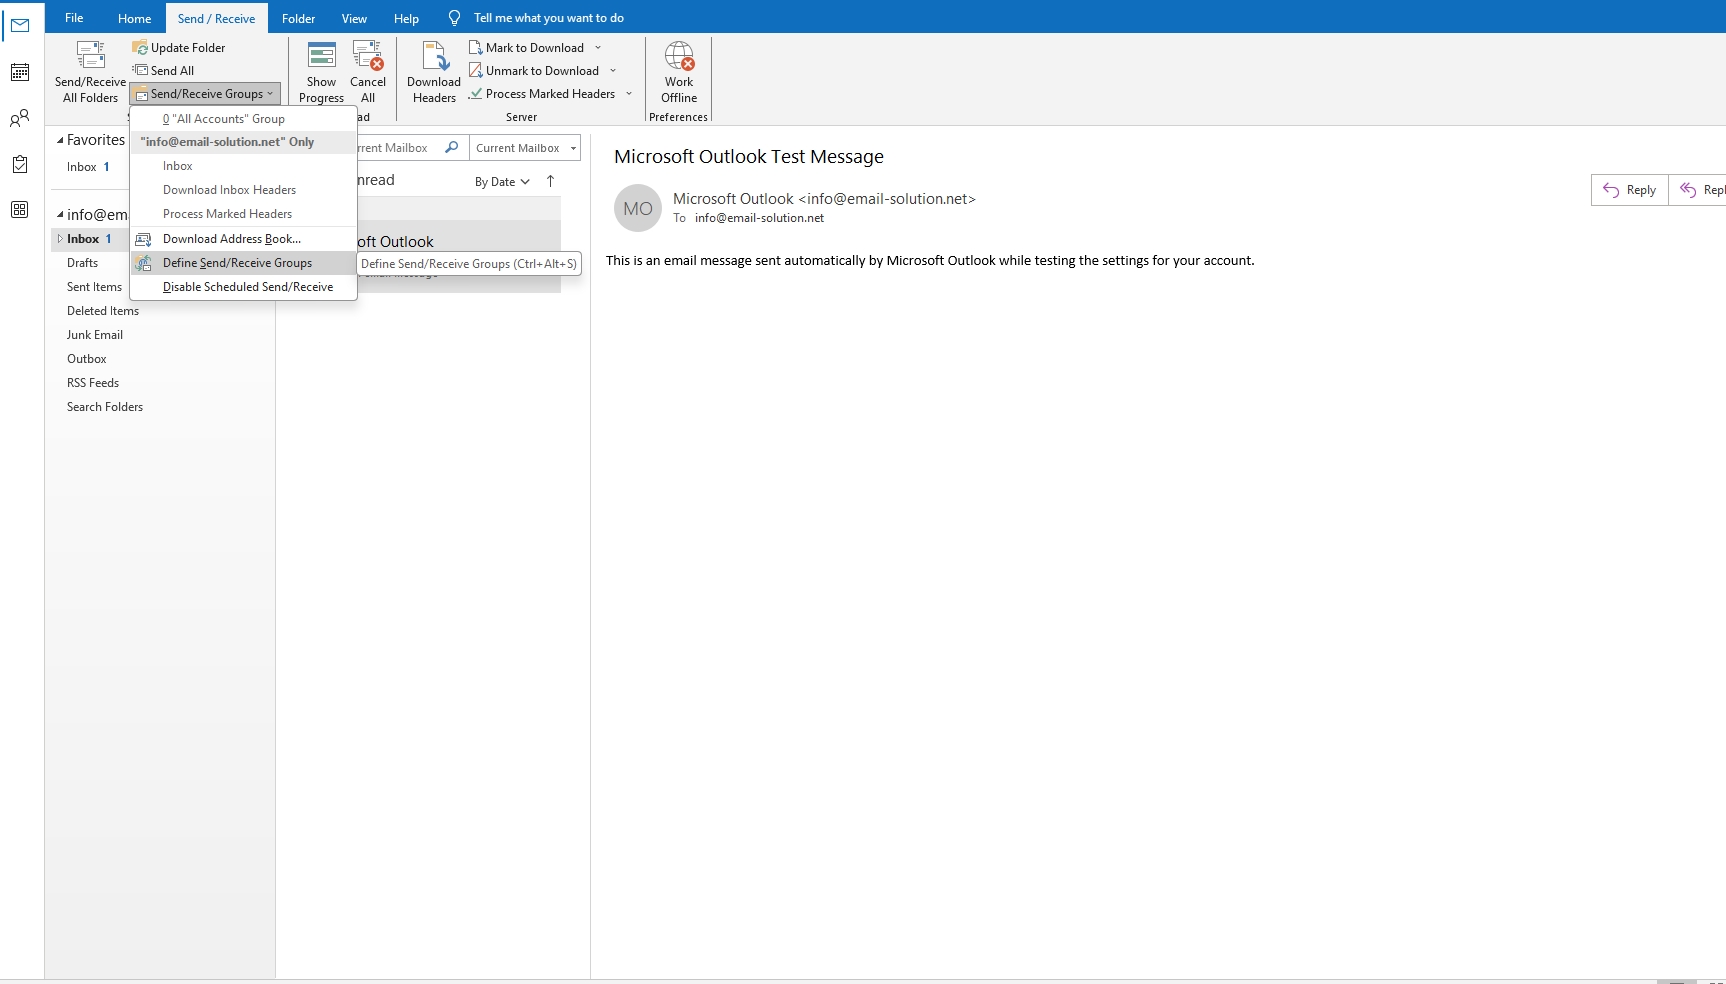
選取” Edit ” .

如下方三張截圖檢查或修改.