How to set up an email account in Outlook 2019
Below, we will show you how to set up an email account in Outlook 2019.
1. Open the Outlook 2019 application and click “File” / “FILE” in the upper left corner
After clicking “File” in the upper left corner, the following page will appear. Please click “Add Account”
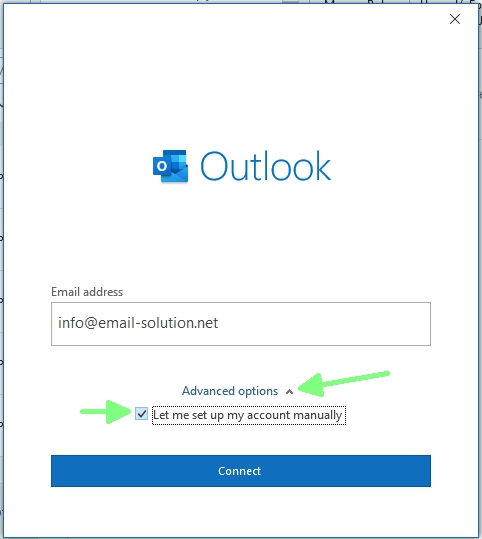
Enter your email
Open ” Advanced options ” and click ” Let me set up my account manually ”
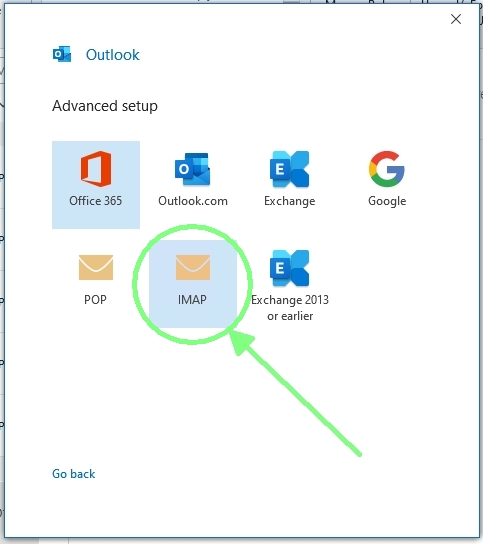
Choose POP or IMAP
POP (email download to your computer, suitable for users in fixed locations, e.g. office users)
IMAP (emails are stored on the server, suitable for multi-device users, e.g. mobile users)
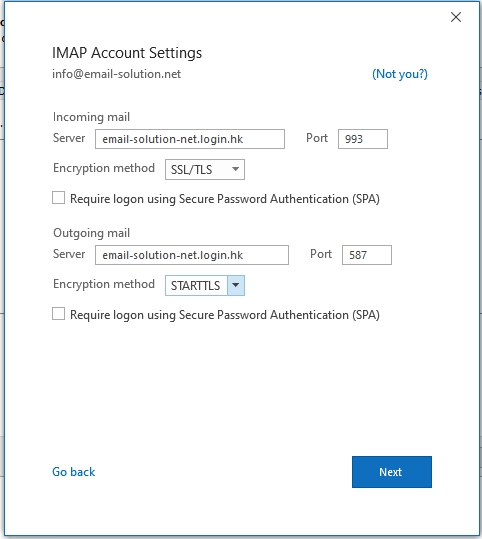
The default data as shown below appears, and click “Next”
(Please refer to the account information email for the email server name)
Incoming Mail via IMAP (emails are stored on the server, suitable for multi-device users, e.g. mobile users)
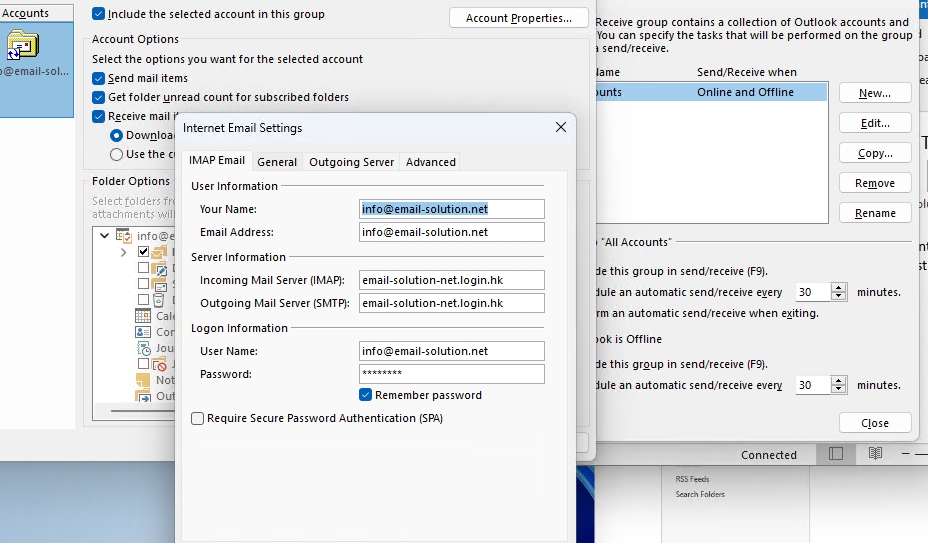
IMAP Server: yourdomain-com.login.hk
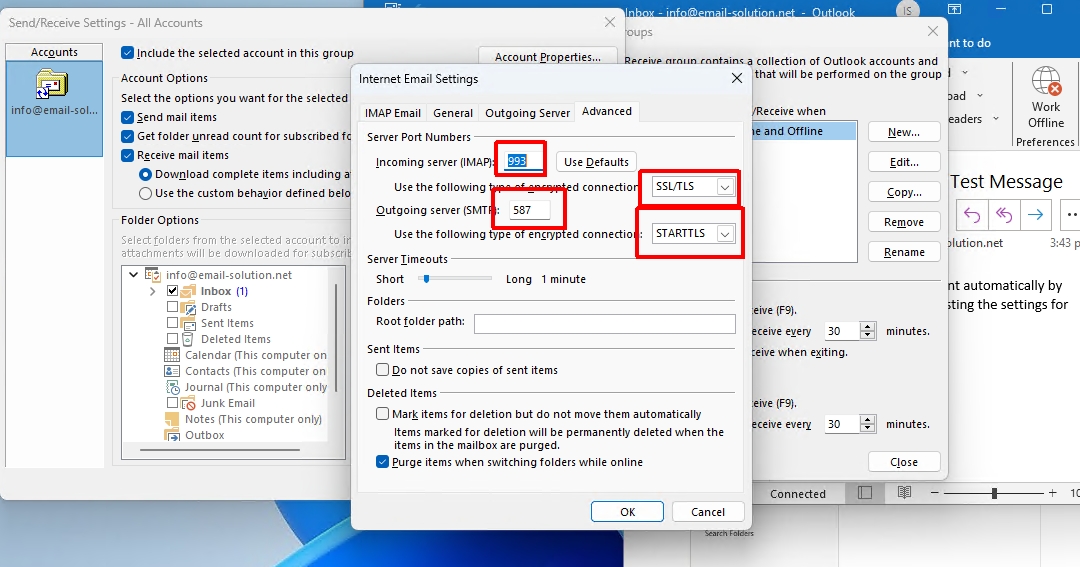
IMAP Port: 993
Encryption method: SSL/TLS
or
Incoming Mail via POP3 (email download to your computer, suitable for users in fixed locations, e.g. office users)
POP3 Server: yourdomain-com.login.hk
POP3 Port: 995
Encryption method: SSL/TLS
——
Outgoing Mail SMTP
SMTP Server: yourdomain-com.login.hk
SMTP Port: 587
Encryption method: STARTTLS
——
SSL and TLS are encrypted connections
STARTTLS is an opportunistic encrypted connection (if TLS encryption is supported, use TLS encrypted connection; otherwise, use normal connection)
Plain-text is a plain (unencrypted) connection
Enter your email password and click “Connect”
Finish
Now, your email account has been successfully set up in Outlook 2019 and can be used.
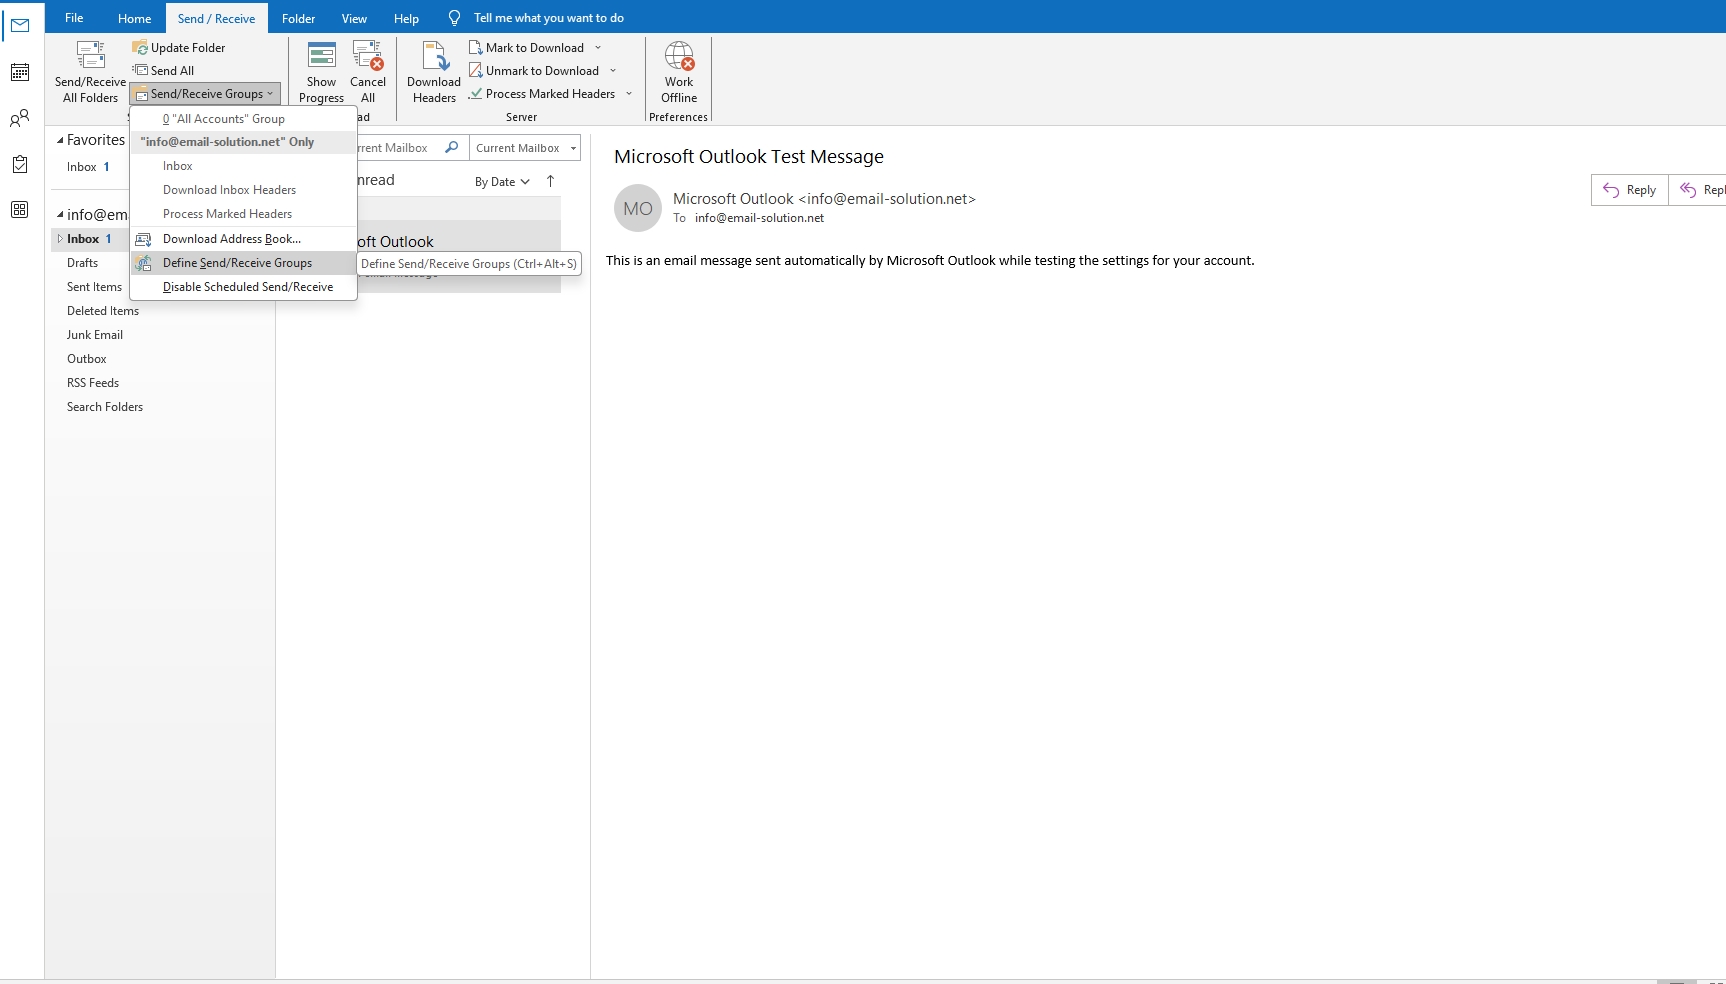
If you need to modify the settings in the future,
In Outlook Send/Receive > Send/Receive Groups > Select your email address > Define Send/Receipe Group
Select ” Edit ” .
Check or modify the three screenshots below.


