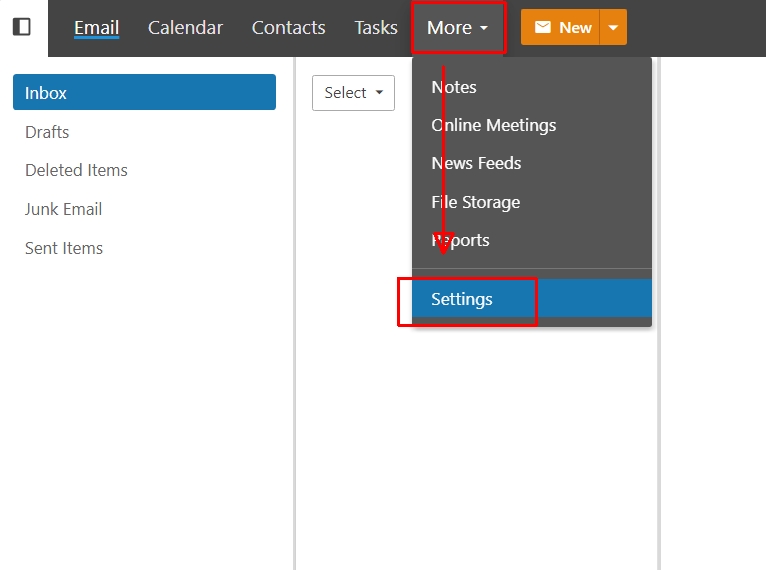
Users can log in and set up to enable two-factor authentication, as shown below
Press More > Settings >
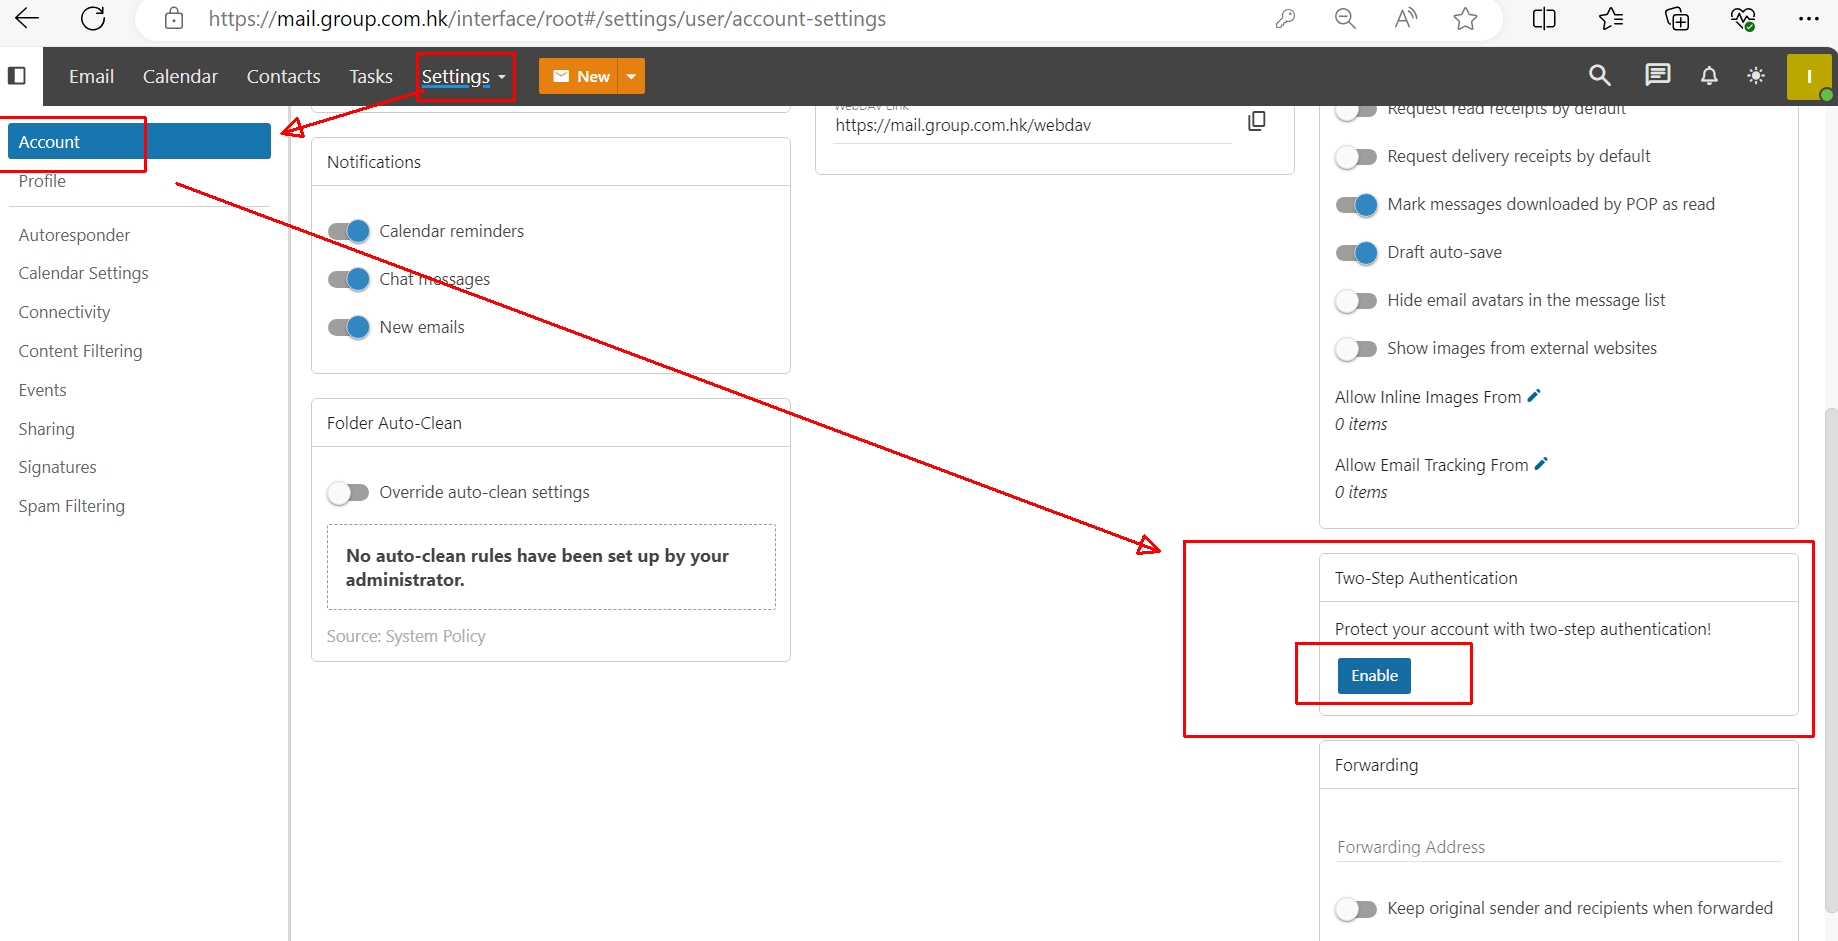
Settings > Account > Two Authentication > Enable
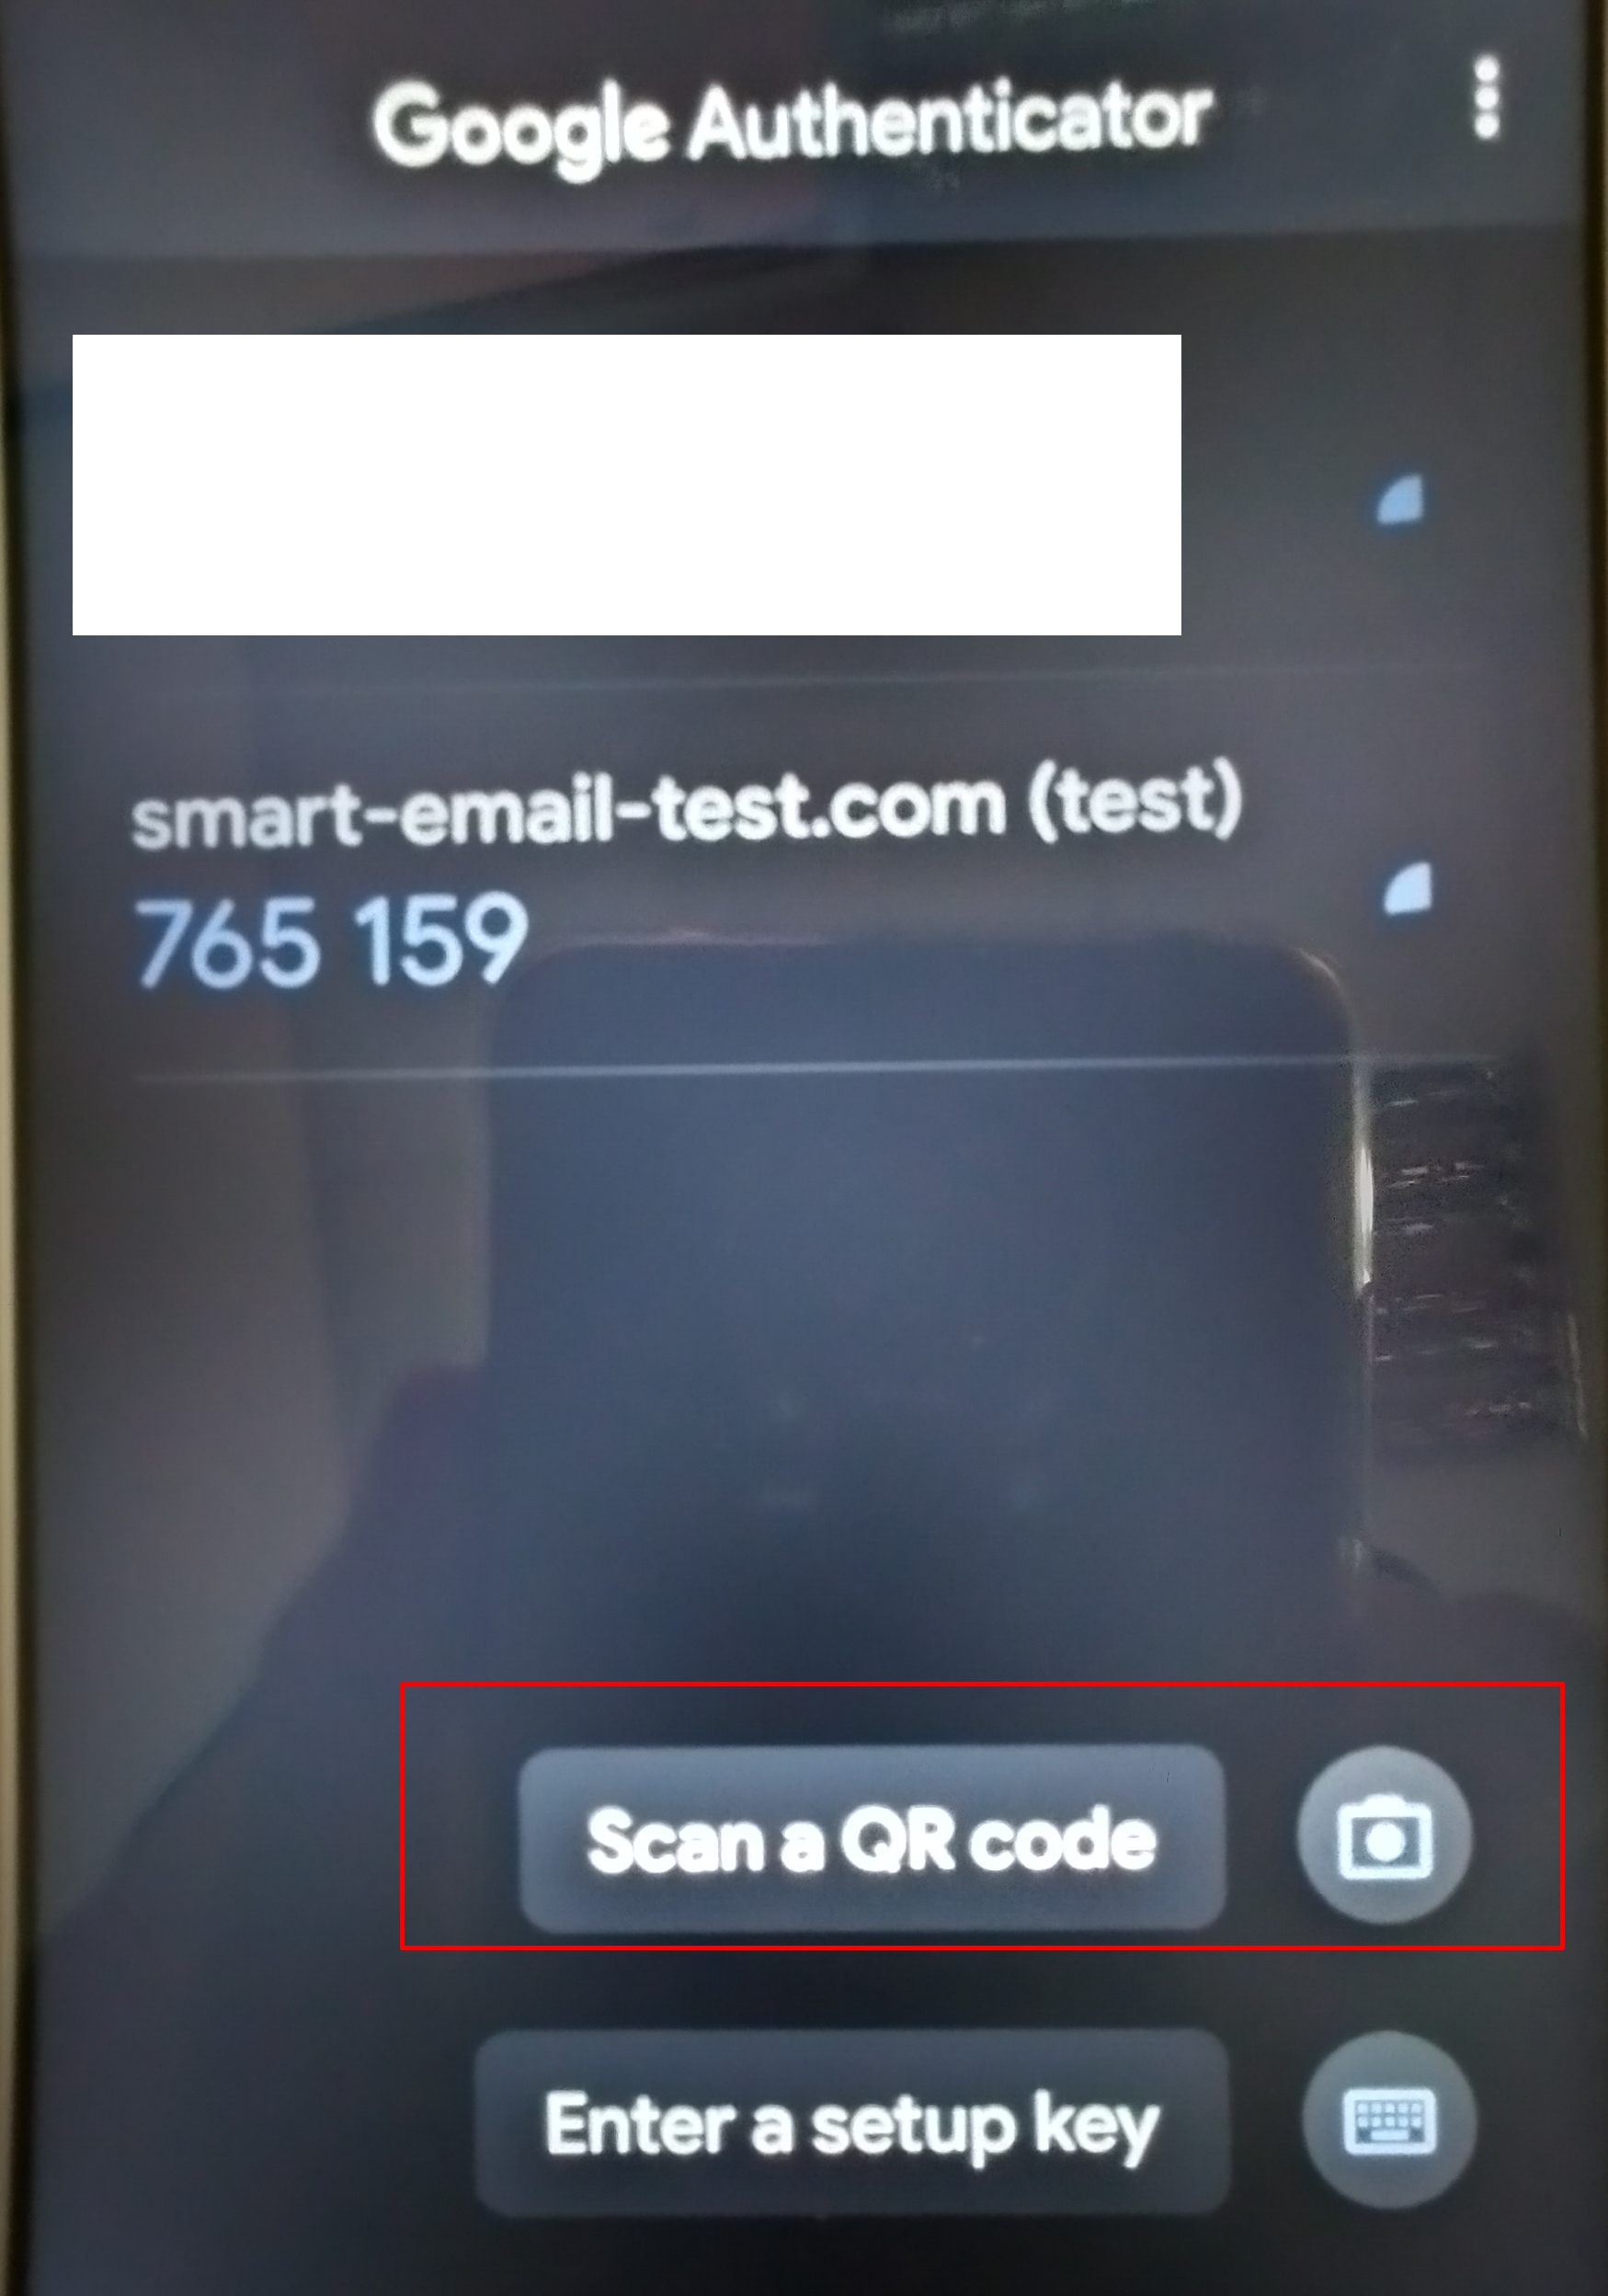
Verification method: Verify APP (for example, for iOS and Android’s Google Authenticator< /a> or Microsoft Authenticator )
Backup email address: Email address (if there is a problem with the app: for example unable to scan the QR code, you may need to have an authentication code sent to you via this email)

Press Next when finished
Here please open the Authenticator App pre-installed on your phone and scan the QR Code.
A verification code will be generated from your verification app.
(Note that the verification code will be updated automatically within a short period of time.)
Enter the verification code to test and click [Check] to complete.

congratulations! Two-factor authentication has been successfully enabled for your SmarterMail account!
In the future, when users log in to SmarterMail, in addition to entering their password, they will also be asked to enter a verification code.

To use IMAP / POP / SMTP (e.g. Outlook, ThunderBird, iPhone Mail apps, Android Mail apps),
You will need to log in using its Apps password.
(Apps password is a 16-digit randomly generated password)
Click the [eye] icon on the right.
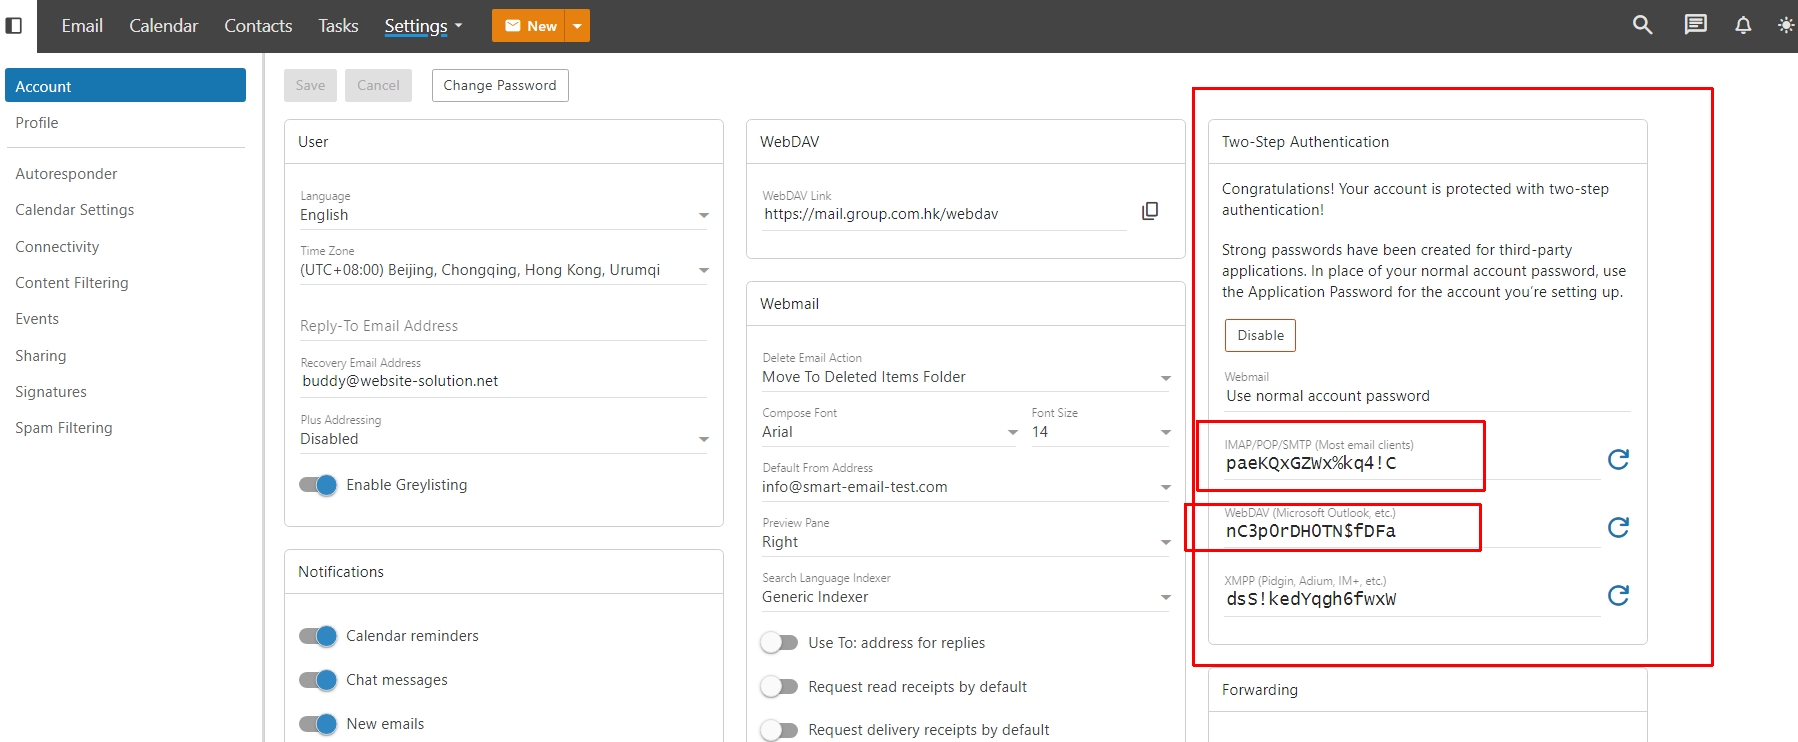

To reset your Apps password,
Please click the [Eye] icon, click the [Arrow] icon and click [Reset]
Just copy the displayed password to the device you need to use.
Such as Window Mail / Outlook  </a >
</a >