In order to restore your website with system backup, your website hosting account shall have enough space for –
1. temporary backup file, and
2. extracted public_html
Approximately, it shall be double of your current website file size
If you are running out of the storage, you may contact us for a temporarily increment of the storage quota (for 3 days)
Note: Below procedure may not be applicable to Parallels Site Builder 4.5 or Parallels Web Presence Builder 11.5
[Website Files restoration]
Login DirectAdmin Panel (e.g. https://www.YourDomain.com:2222 )
At the top, goto File Manager

Goto the folder – /domains/YourDomain.com ,
you shall find a folder called public_html ,
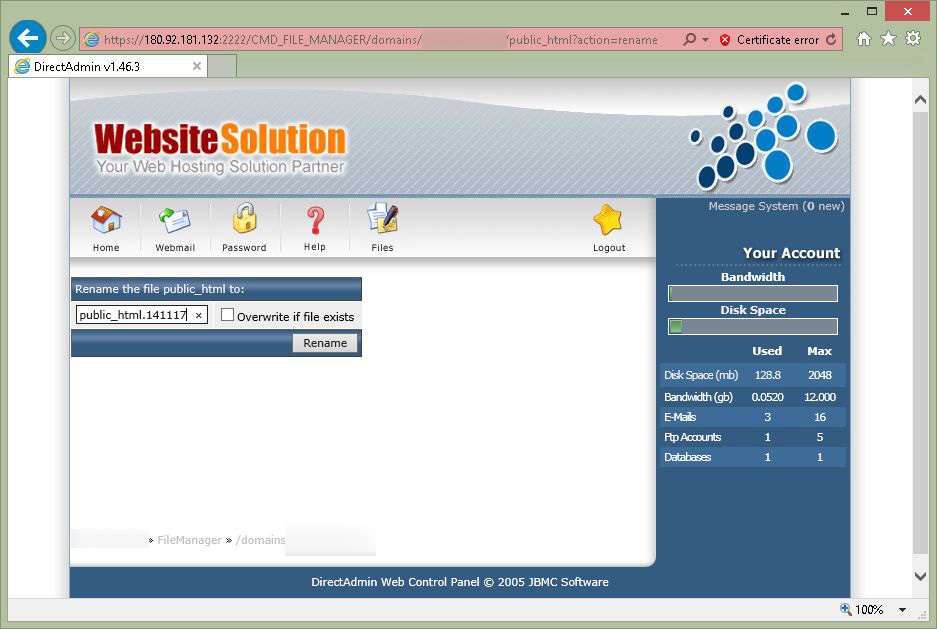
click on Rename link
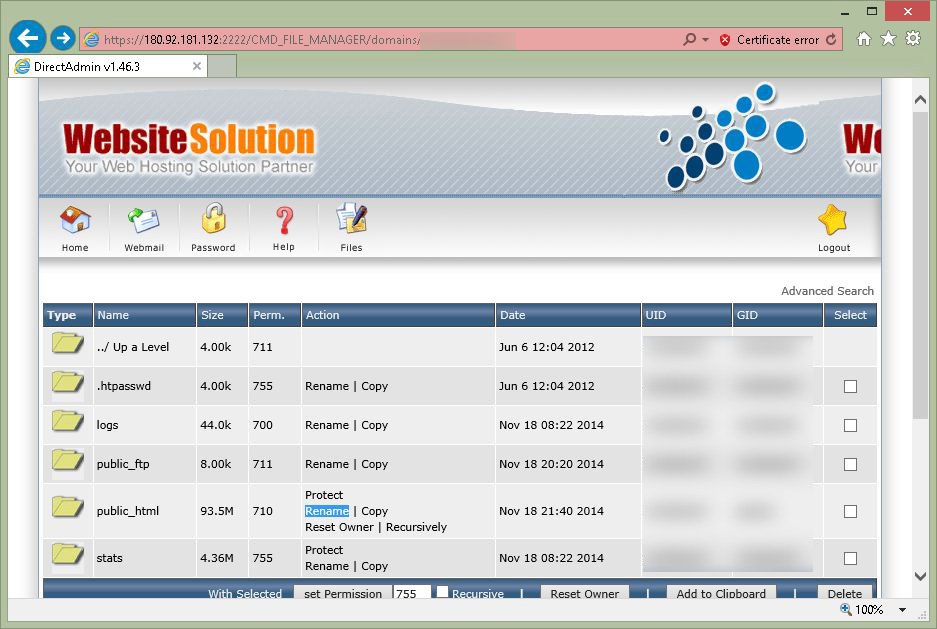
Rename it as (e.g.) public_html.141117
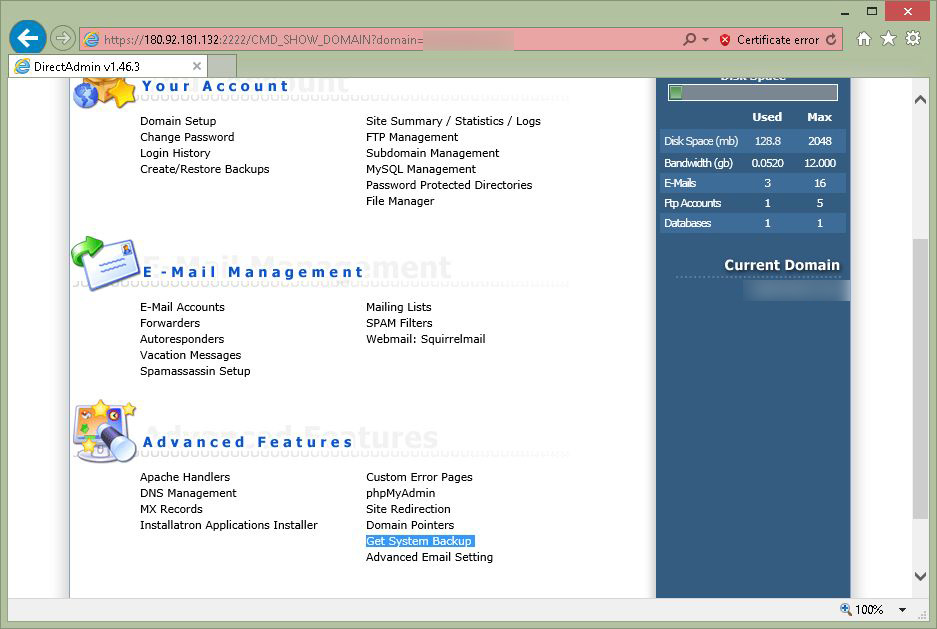
Goto DirectAdmin panel front page,
at the bottom, choose – “Get System Backup”
You will see the following, choose a day of backup
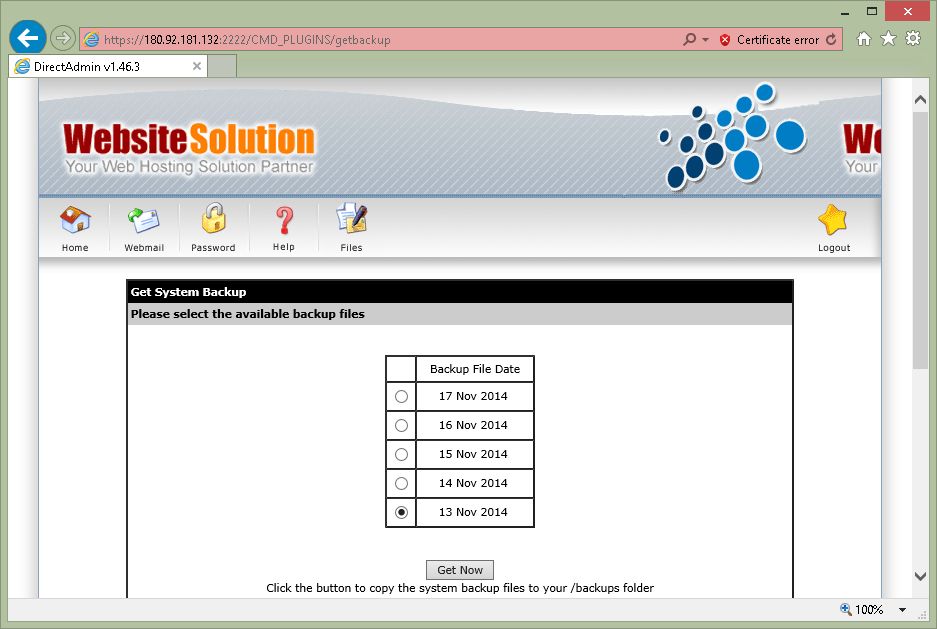
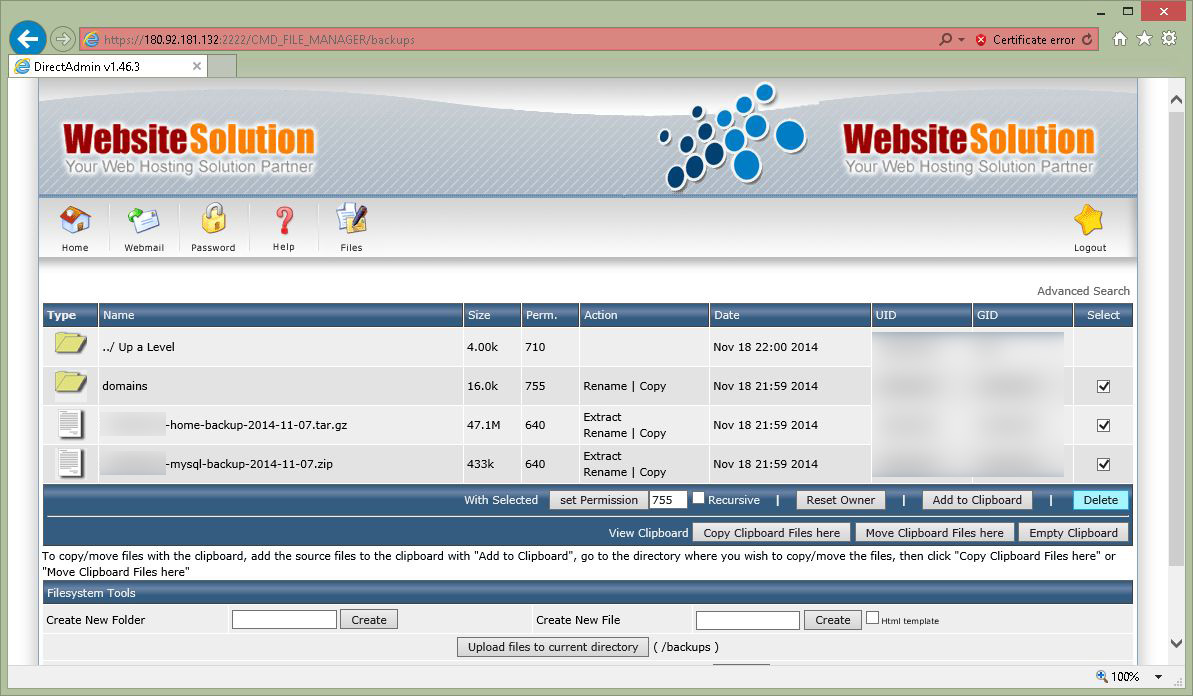
It will take a few seconds/minute, and create a compressed files at the folder – /backups
(If you have MySQL databases, it will also copy MySQL dump file)
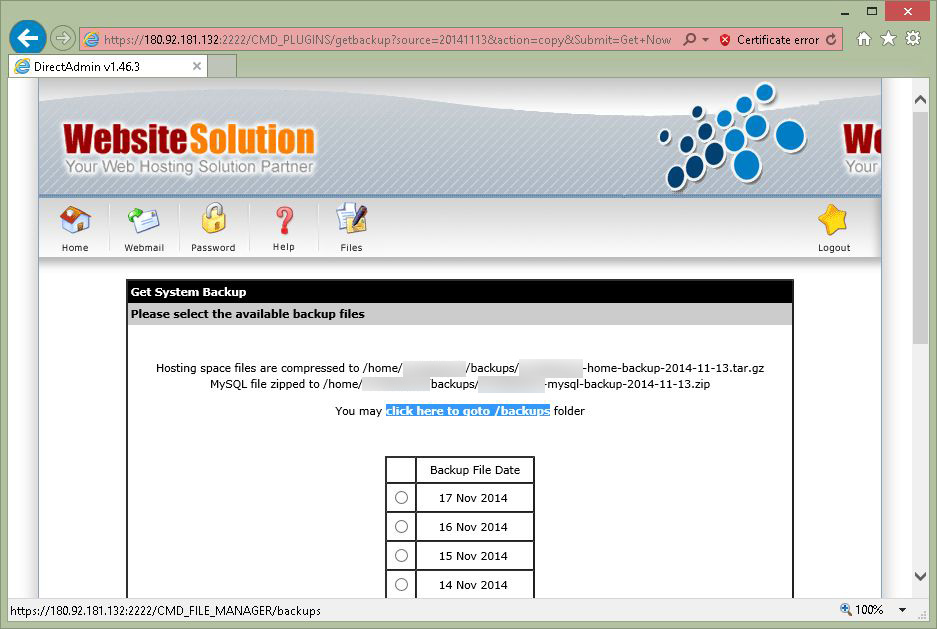
Then, click the link (as above image), goto /backup folder
You shall see the tar.gz file (and the MySQL dump zip file if have)
You may consider to download the tar.gz , and extracted by WinZip to restore individual file if necessary.
Below we will illustrate to restore the whole public_html folder
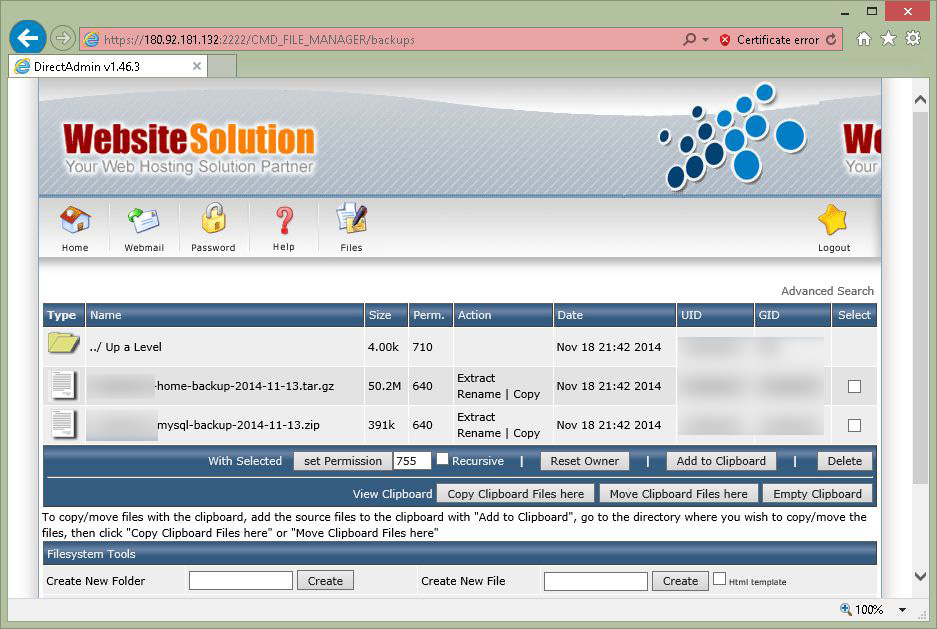
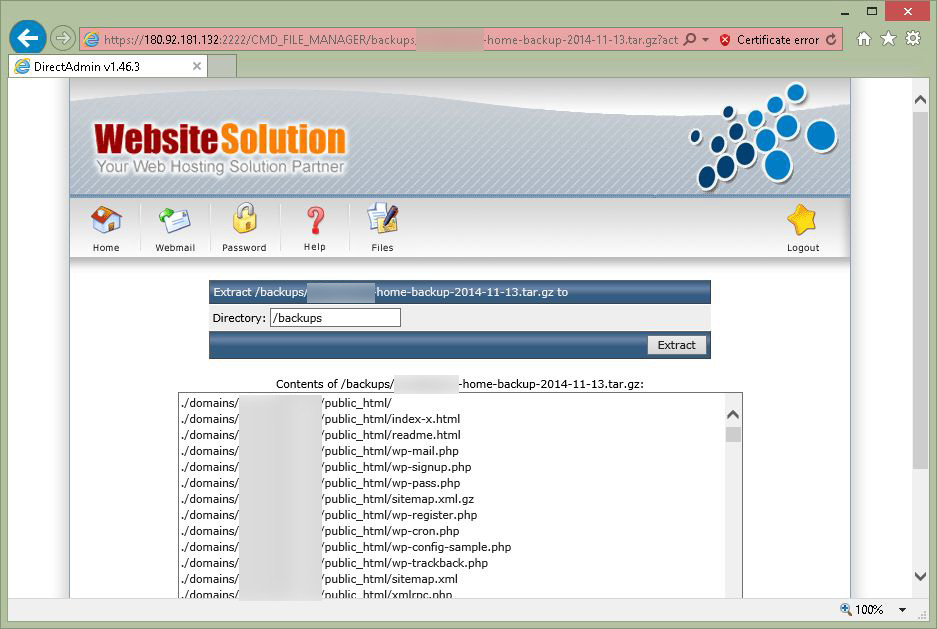
In the tar.gz file, click on Extract link

It will show the tar.gz archive file content as below,
and keep default to extract to /backups folder
click on Extract button
Extracted website files to /backups/…
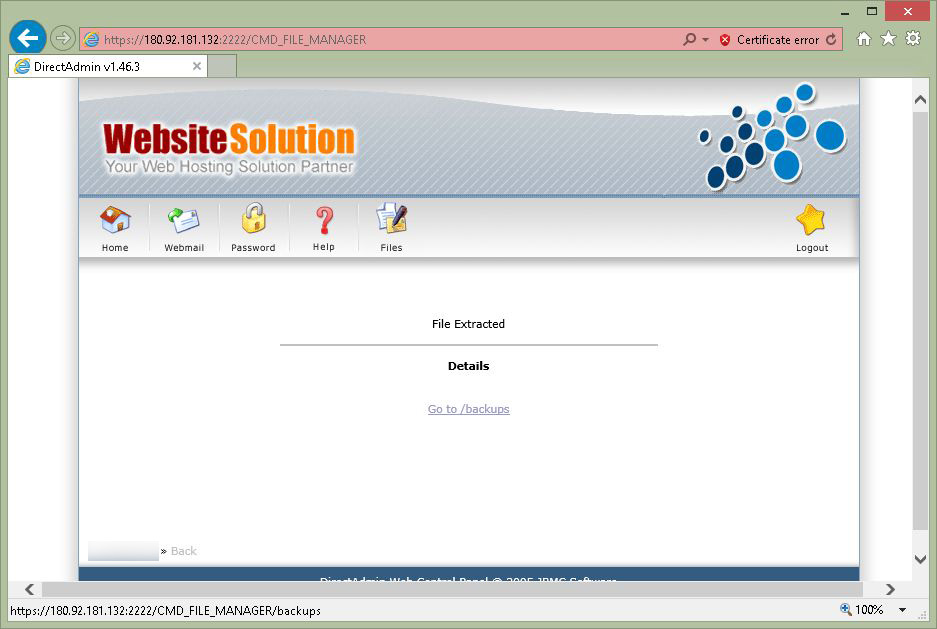
You will see there is a folder – domains – under the folder /backups

Actually, you will have the following path generated –
/backups/domains/YourDomain.com/public_html
Now, we need to move the webpage folder (public_html)
from /backups/domains/YourDomain.com/public_html
to /domains/YourDomain.com/public_html
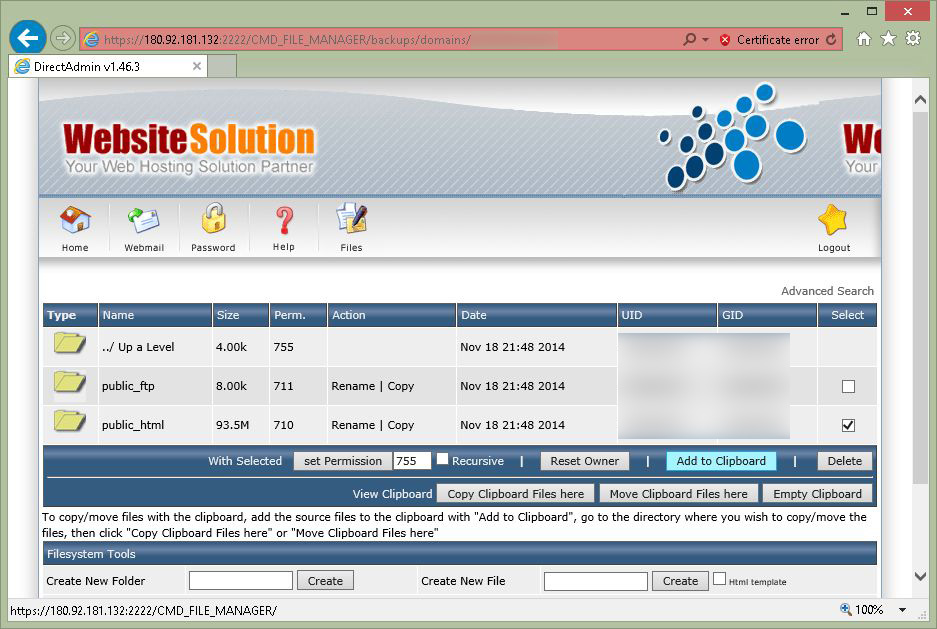
Use File Manager,
Navigate to /backups/domains/YourDomain.com/
You shall see the folder – public_html – as below
select the public_html folder (at the right hand side)
at the bottom, click “Add to Clipboard”
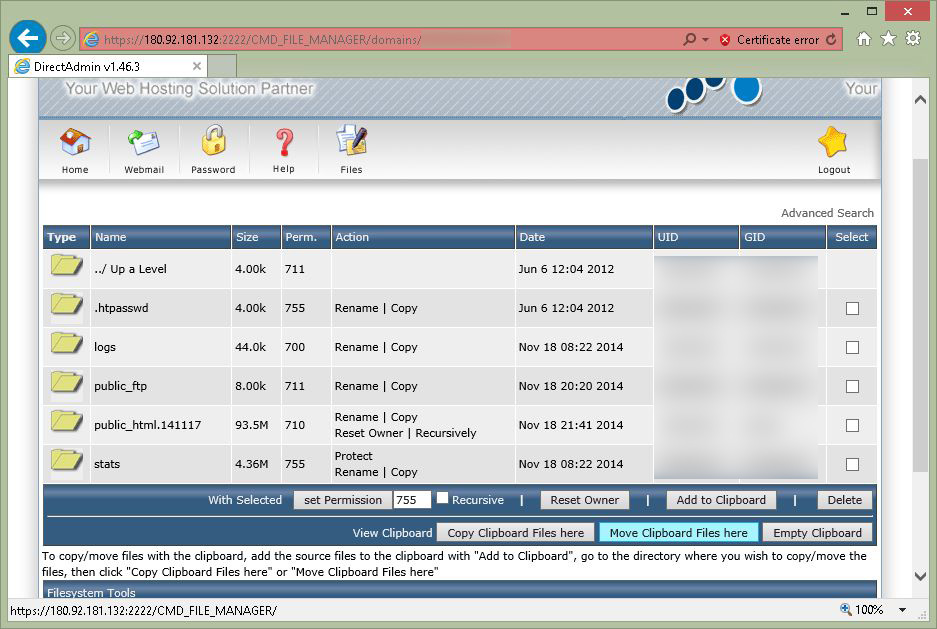
Navigate to /domains/YourDomain.com (no /backup)
(You shall find the previously renamed folder)
At the bottom, click on button – “Move Clipboard files here”
Then, you have moved the restored public_html folder.
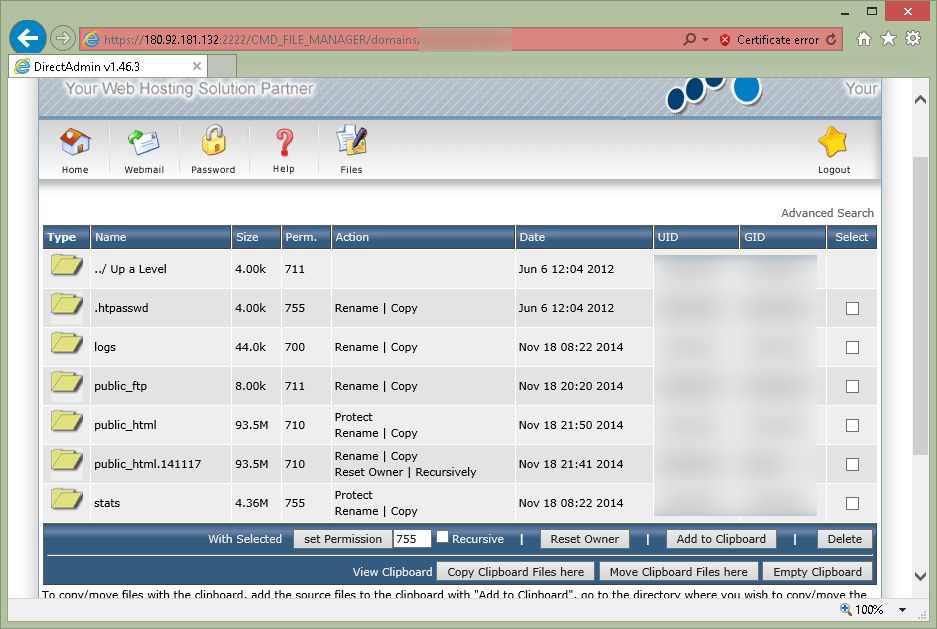
On the right hand side, select the folder – public_html
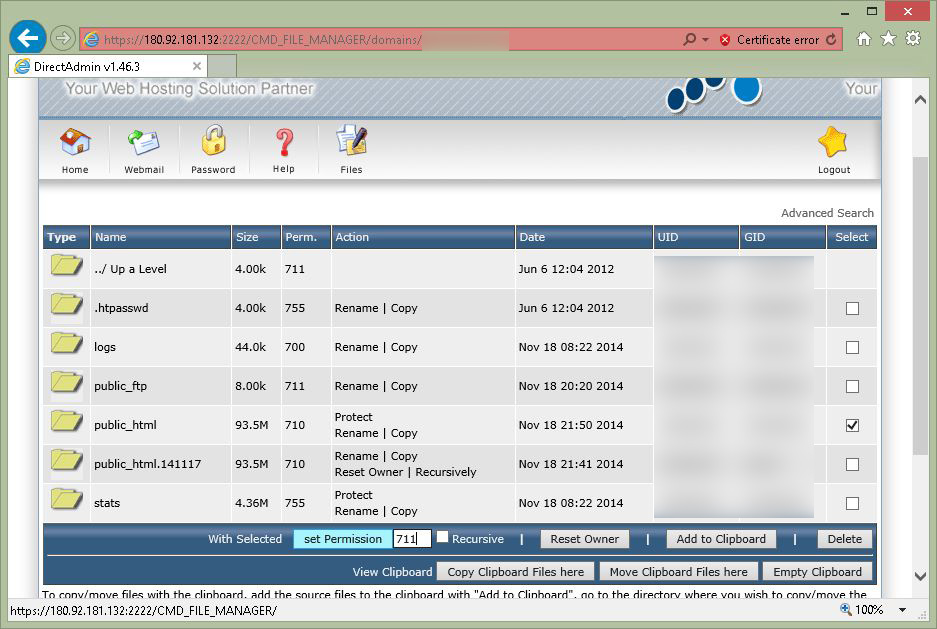
At the bottom, nearby “set Permission”, fill in permission – 711
and click on button – “set Permission”
(i.e. change the permission from 710 to 711 for Apache web access)
We have finished the website file restore.
Now, we will goto MySQL database restoration
[MySQL restoration]
Note: not ALL websites require MySQL database restoration.
If you are running CMS (e.g. WordPress, Joomla, Drupal, OpenCart, Magento), or PHP/MySQL application else, you may need to restore MySQL database too.
If you do not need to restore MySQL, you may goto the bottom part for clean up section.
Use the File Manager, goto /backups folder,
and Download the MySQL dump file in zip format to your desktop.
Extract it and check how many SQL files inside the ZIP archive.
If there are 1 SQL file inside the zip file, it means you have only 1 database.
If there are 2 SQL file inside the zip file, it means you have 2 database, and the same.
If you have 2 (or more) SQL files inside the ZIP file, please unzip those SQL files, and proceed the following once per database.

Goto DirectAdmin panel front page
At the bottom, goto phpMyAdmin
You may login with your MySQL database username/password,
or DirectAdmin panel username/password
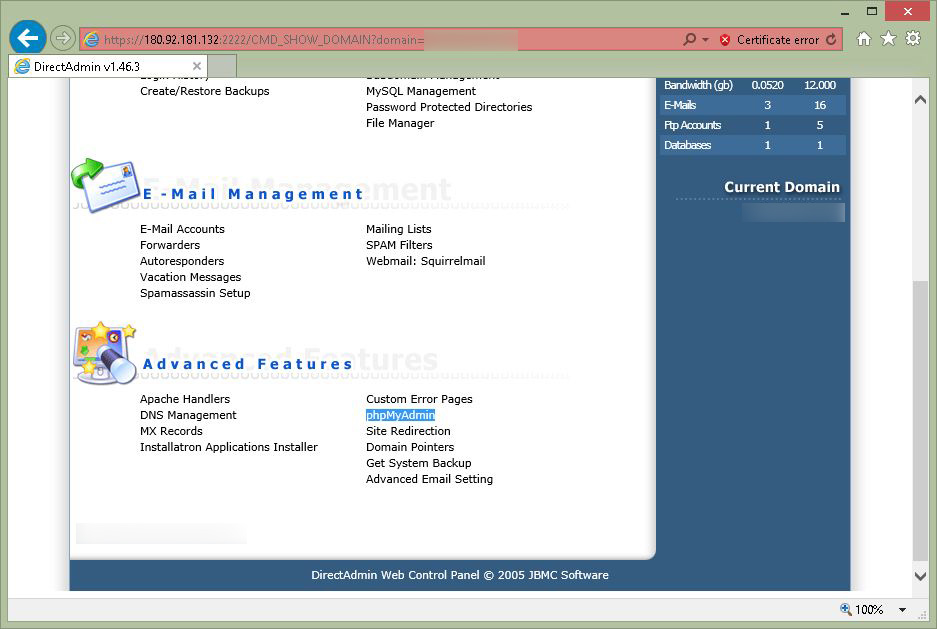
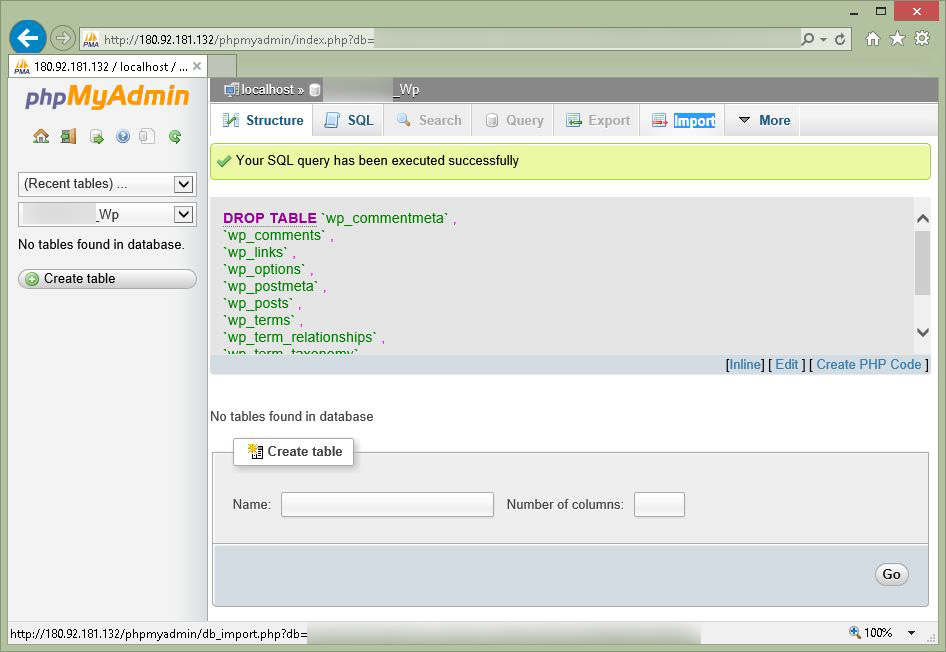
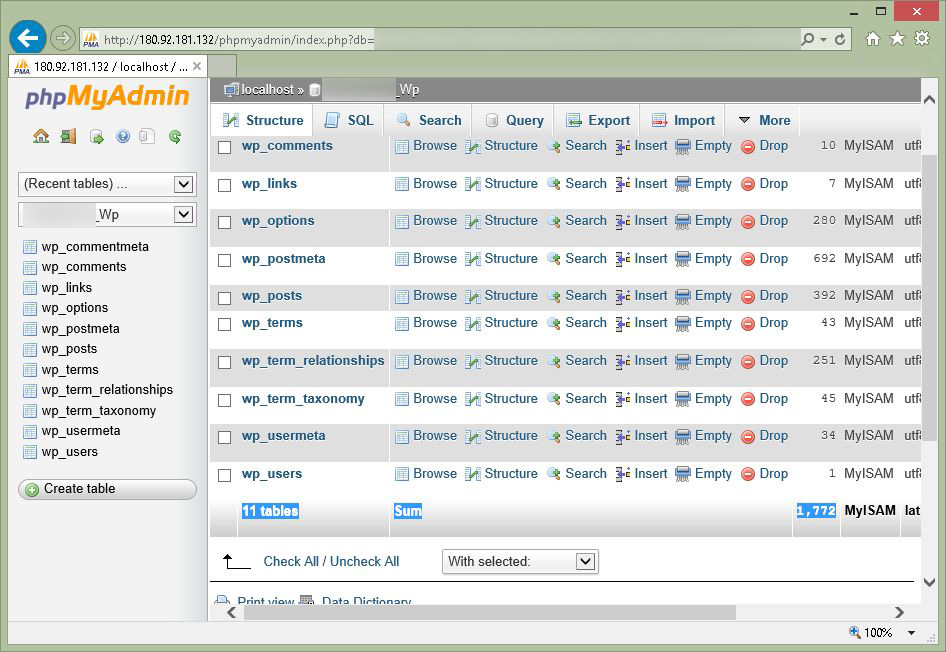
After login phpMyAdmin, you shall see the following list as below –
Jot down the number of tables and records for reference
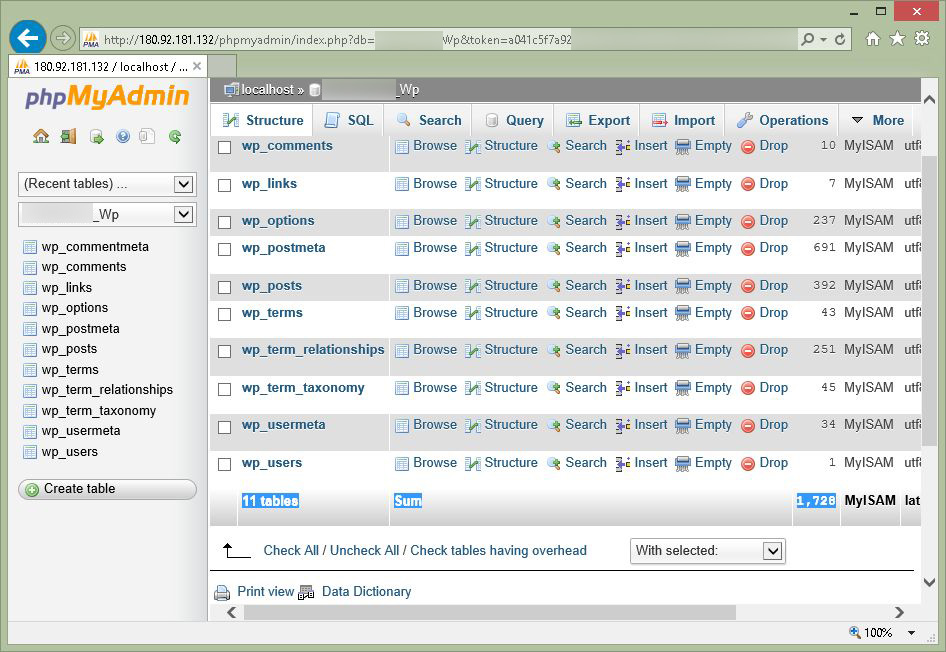
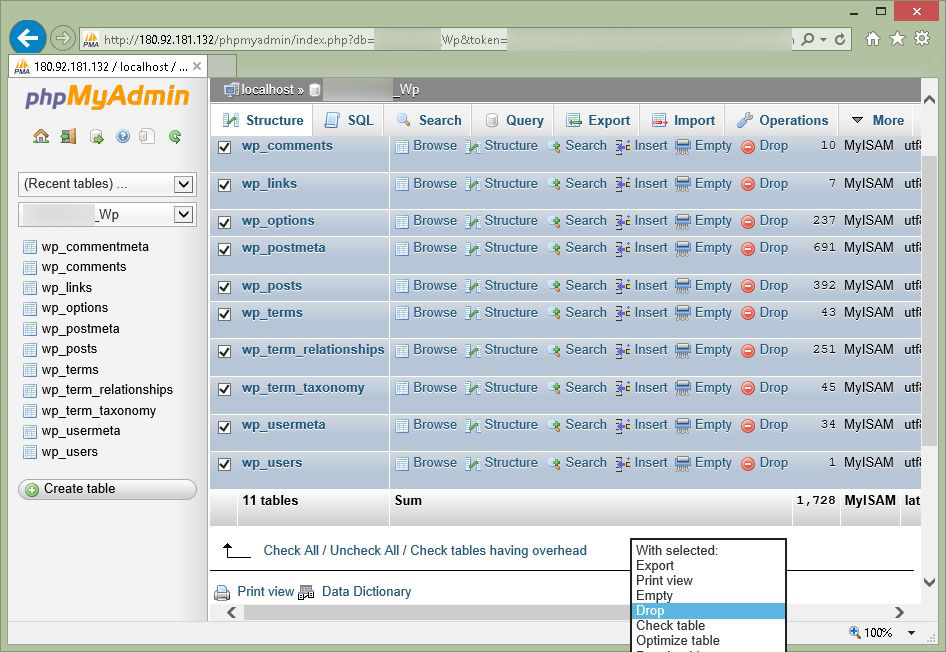
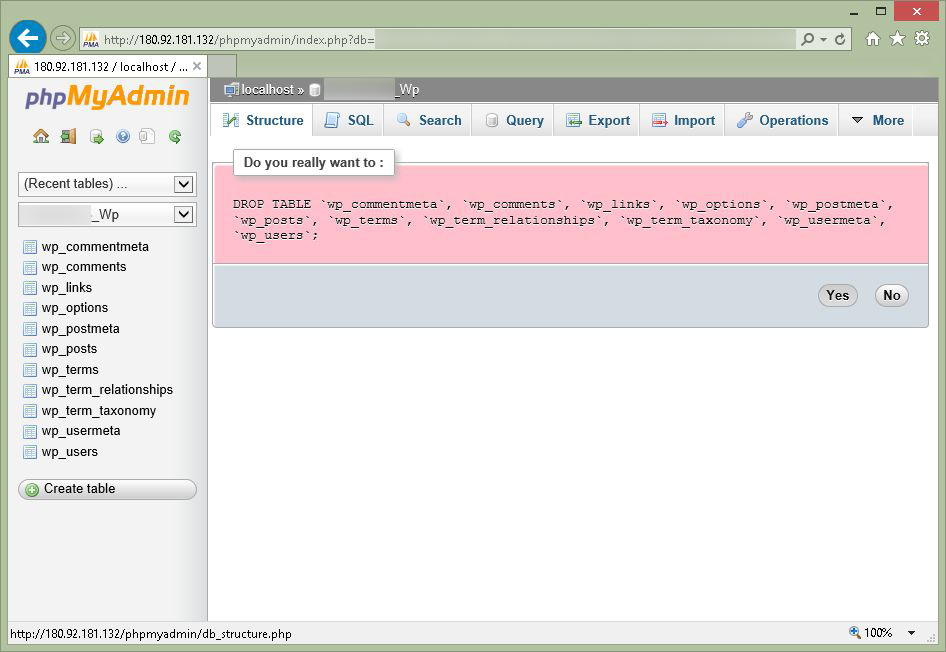
(Optional) for clean restoration, you may select all tables, and drop it (i.e. delete ALL table before restore)
Confirm to drop the tables?
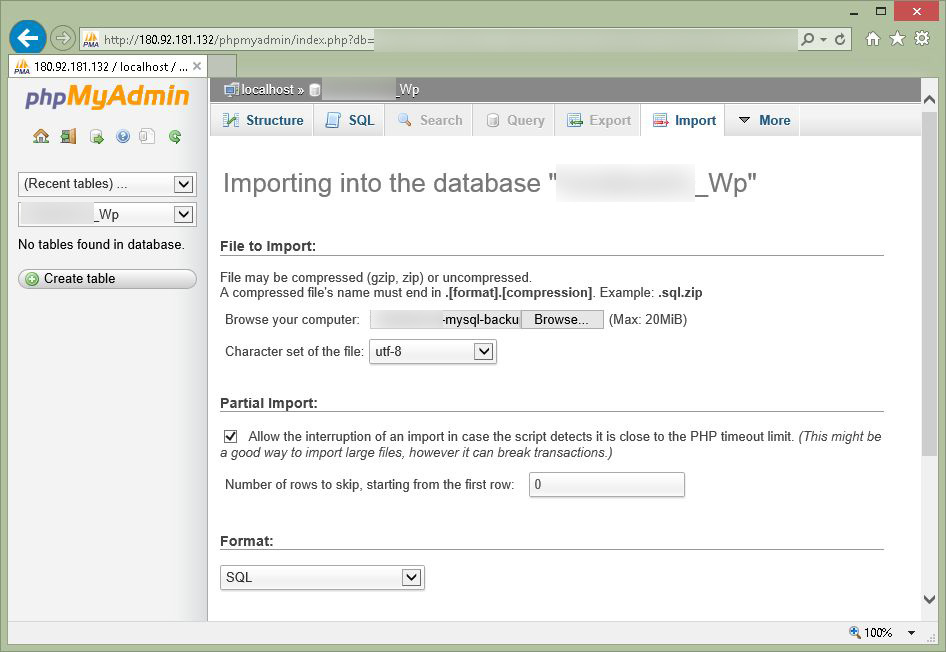
Now, we will import the MySQL dump file
At the top, choose Import
Choose your SQL (or zip) file
(Choose zip file if you have only 1 SQL file inside the ZIP)
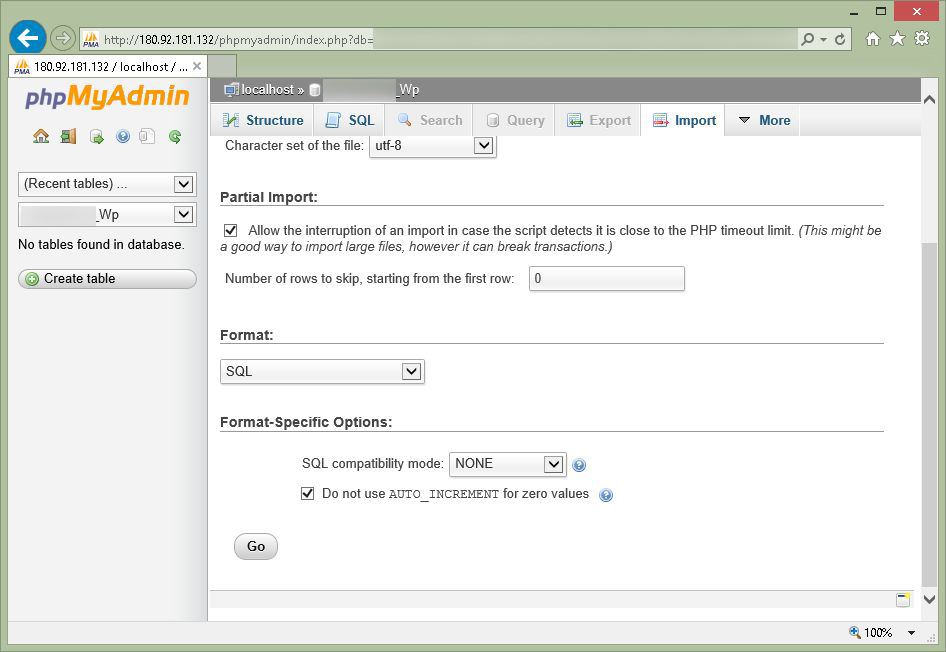
and proceed the import
Then, it will import the MySQL dump file (example as below)
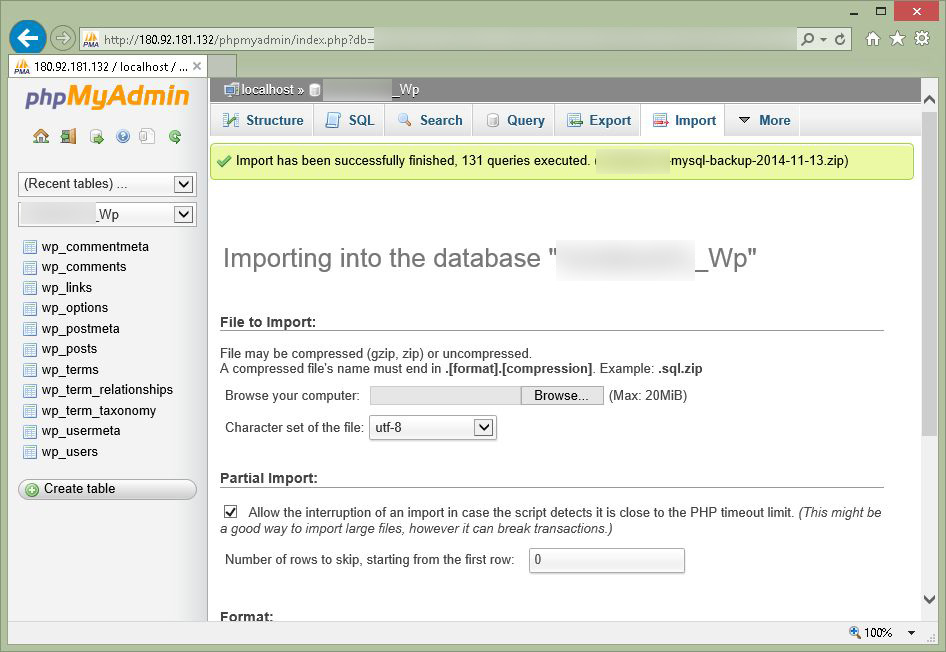
Check (and compare) the number of tables and records.
If the SQL backup file is too large, exceed the phpMyAdmin import limit (around 20MB), you may consider to use this method.
Generally, it shall have a small difference of number of records, as the backup shall be yesterday, or a few days ago.
Then, the MySQL restore is completed.
You shall re-visit and check your website.
[Clean Up]
If everything OK, you shall clean up the unnecessary files
Goto DirectAdmin panel, File Manager
goto /domains/YourDomain.com/
and remove the old website folder – (e.g.) public_html.141117

Use File Manager, goto /backups
and remove the /domains folder, the tar.gz file, and the zip file.
Done.